
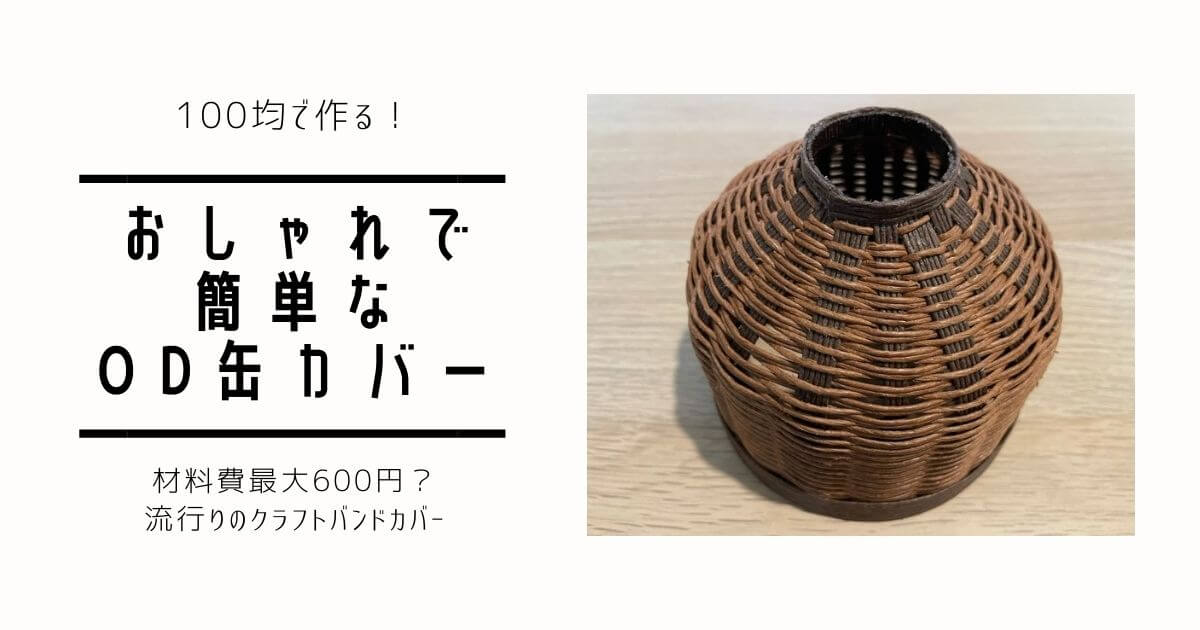
ゆるキャン△でなでしこちゃんが魅了されていたことで有名なルミネールランタン。
そのルミネールランタンのOD缶カバーが100均のものでDIYできるので今回作ってみました!
材料は全てDAISOで揃うものなのでぜひおうち時間にやってみいてください!
100均の材料で作れる簡単OD缶カバー
今回作ったカバーはこちら
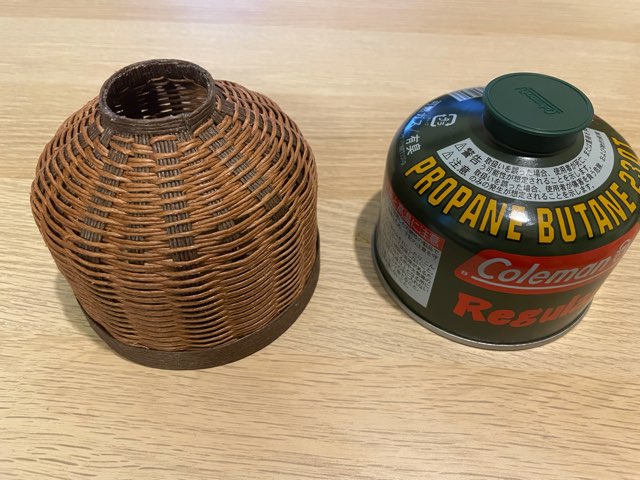
DIYしたOD缶カバーは左のものです。ペーパークラフトで作ったカバーになります。
ペーパークラフトOD缶カバー自作2個目 失敗作。
— BJ(いびきネ申)節酒0日目GRJ79&HZJ76乗り🏕🍍💤🛻🚙 (@BjCamping) September 9, 2018
次回3回目は成功なるか?😅 pic.twitter.com/JVY9IhQPdj
缶のパッケージを隠せるのでよりおしゃれになります。
材料費は高くても600円
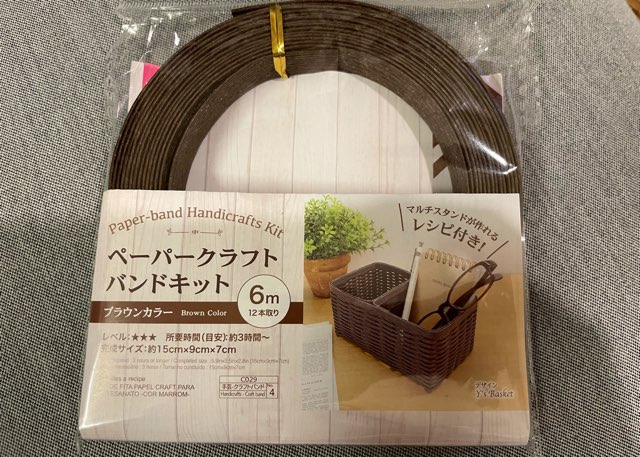
このペーパークラフトバンドキットというものがDAISOの手芸コーナーで買えました!
なので全て材料はDAISOで揃います!ボンドや洗濯バサミなどがなくてもDAISOで売っているのでかかっても600円で作れちゃいます。
ボンドなどおうちにあるよという方はペーパークラフトバンドを買うだけなので200円で出来ちゃいますね!
お好きなOD缶で作れる
OD缶によってサイズが異なるので、それに合わせたOD缶カバーを探すのはなかなかめんどくさいですが、自作だと好きなサイズで作れます!
アレンジも無限大
うーん、なかなか難しい。
— 猫キャン (@KJqzGWD1QYEVvzN) April 12, 2021
奥が深いなぁペーパークラフト。
キャンプに行けないからOD缶カバーだけが増えていきそう。#キャンプ好きと繋がりたい #OD缶カバー#ペーパークラフト pic.twitter.com/chx3PRJZh8
今回私は縦紐、網紐を色違いで作ってみましたが、1色でもできますし、上の方のようにいろいろな色を使ってつくることだって出来ちゃいます!
DAISOには赤色や白っぽい色も売ってましたので、お好みの色で作ってみてくださいね!
また編み方を変えたり、ペーパークラフトバンドの細さをアレンジすることも可能なので、いろいろなアレンジができます!
 ふじこ
ふじこいっぱい作ってまうやろ〜〜〜う
早速作っていきましょう!
材料
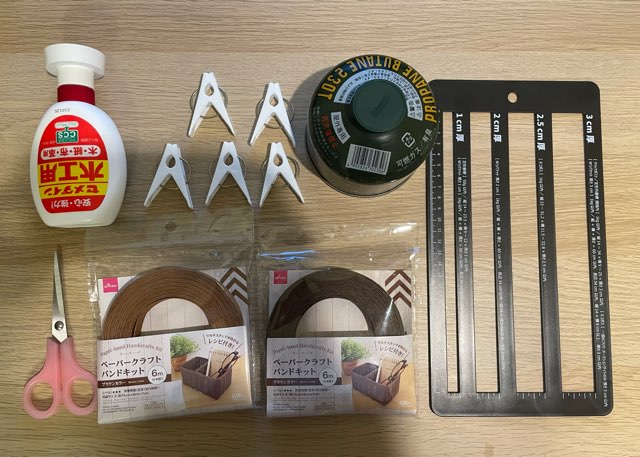
左上から
- 木工用ボンド
- 洗濯バサミ数個
- OD缶
- メジャー、定規
- ハサミ
- ペーパークラフトバンドキット(12本どり)6m
- PPコード

クラフトバンドを裂くときにPPバンドというものがいるのですが、私はいらないカードで代用しました!
パーツを用意します!

編み込む際に必要なパーツを用意していきます!
口部分 4本どり 13cm×1本
縦紐 6本どり 11cm×9本
縦紐 4本どり 11cm×9本
網紐 2本どり 4m×2本
網紐 1本どり 4m×2本
下の部分 12本どり 37cm×1本
ちなみに私は口部分、縦紐、下の部分に濃い茶色を使い、網紐に薄い茶色のクラフトバンドを使うことにしました。
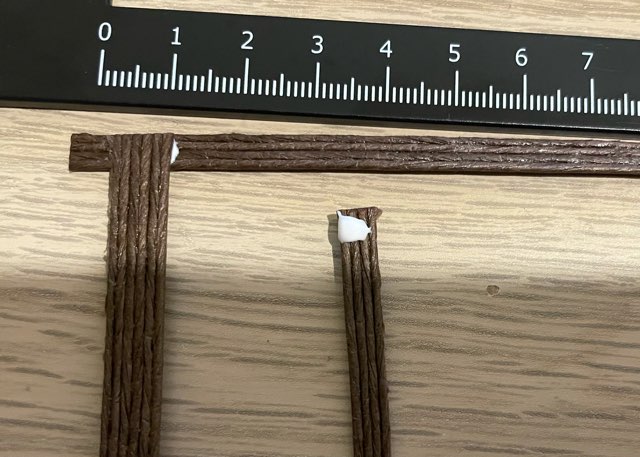
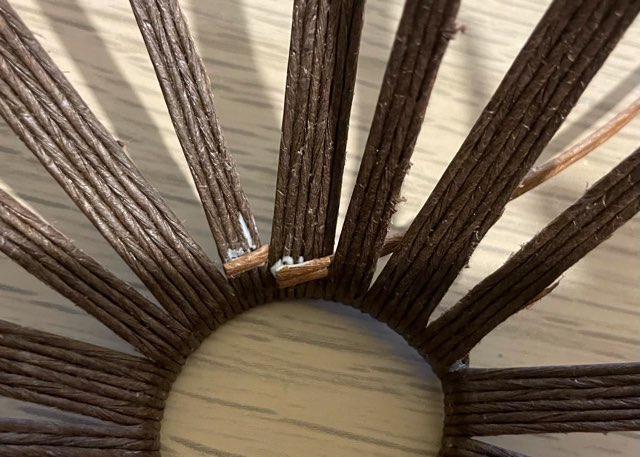
「縦紐 4本どり 11cm」のパーツを作っていきます。
11cmにクラフトバンドを切ります。
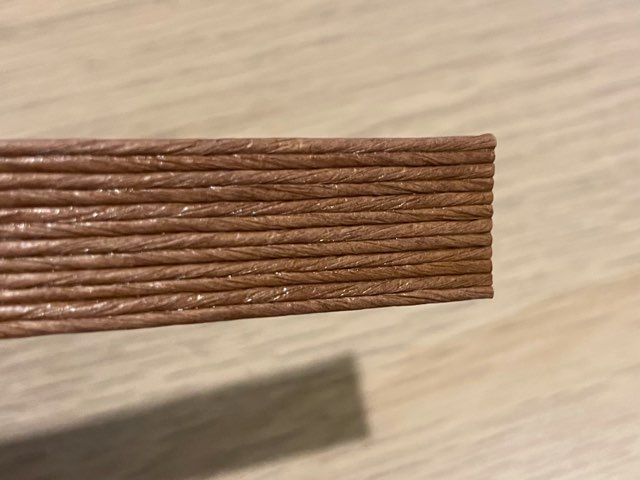
そしてクラフトバンドは上の画像のように12本の紐がひとつになってできています。
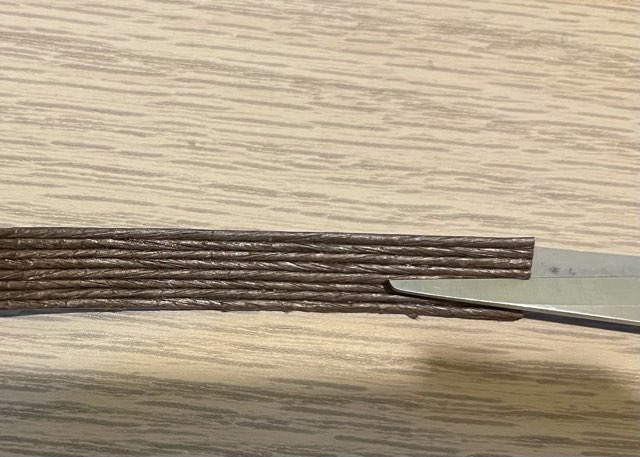
「4本どり」の場合は4本目にハサミで切り込みを入れて
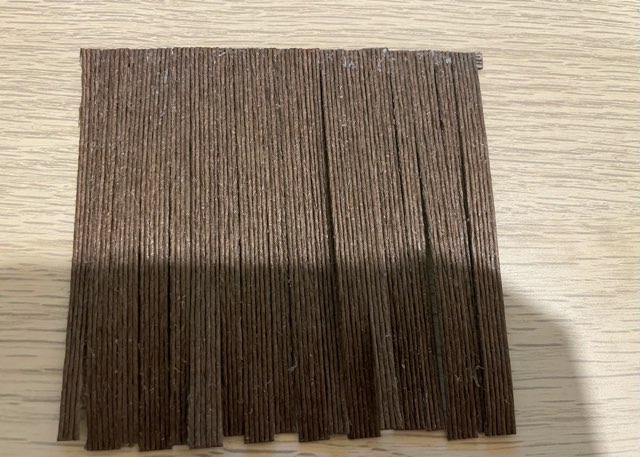
いらないカードやPPコードを差し込み、スライドして引き裂いていきます!
ふじこなかなか根気のいる作業ですが頑張ろう!
 ふじこ
ふじこ時々つっかえる時がありますが、その際はハサミで切り込みを入れると簡単です!
全部パーツが揃ったら準備完了!
ふじこ山場は終わったようなもんだ!
編んでいこう!!!!
口部分の紐に、縦紐6本どりと縦紐4本どりを木工用ボンドで貼りつけていきます。
この際、縦紐6本どりと縦紐4本どりを交互に詰めて貼り付けていきます。
片方の端は少し開けて貼り付けていってください!
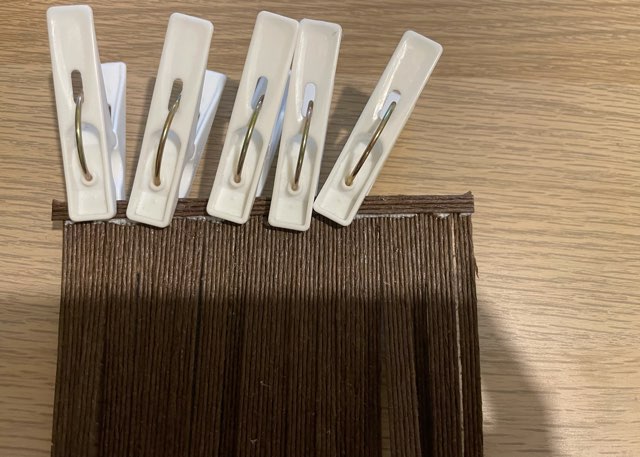
浮いてしまいそうなところに洗濯バサミをつけて、乾くのを待ちます。

OD缶の口の大きさに合わせて輪っかにし、ボンドで貼り付けて洗濯バサミで固定します。

ボンドが乾いたら、縦紐を外側へ折り込みましょう!
網紐をボンドでつけていきます!
4本どりの縦紐に1本どりの網紐、6本どりの縦紐に2本どりに網紐を❸の裏側にボンドで接着していきます。

表から見るとこんな感じです!
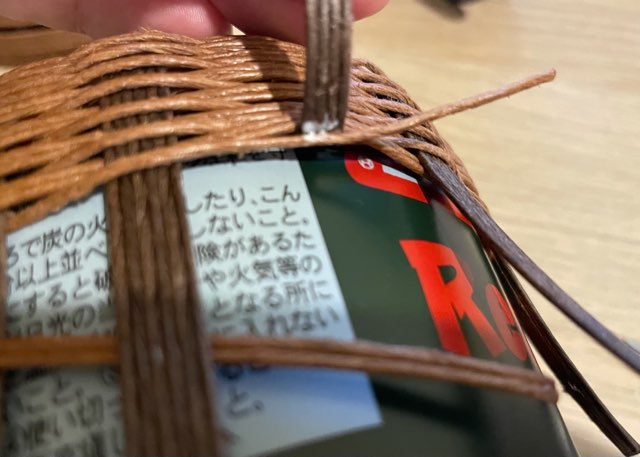
それではOD缶に取り付けて編んでいきましょう!
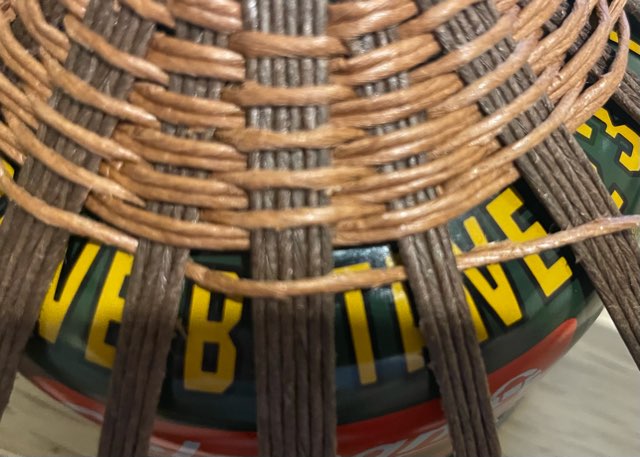
上の図のように1本どりの網紐を6本どりの縦紐の上に、4本どり縦紐の下に来るように、繰り返していきます。
縦紐3本分くらい編み込んだところで、今度は2本どり網紐を4本どり縦紐の上へ、6本どり縦紐の下へと追いかけるように通していきます。
これを何回も繰り返してください!
すると途中で網紐が足りなくなるので、縦紐の裏にもう一本ある網紐をボンドで接着し、つなぎ合わせましょう!
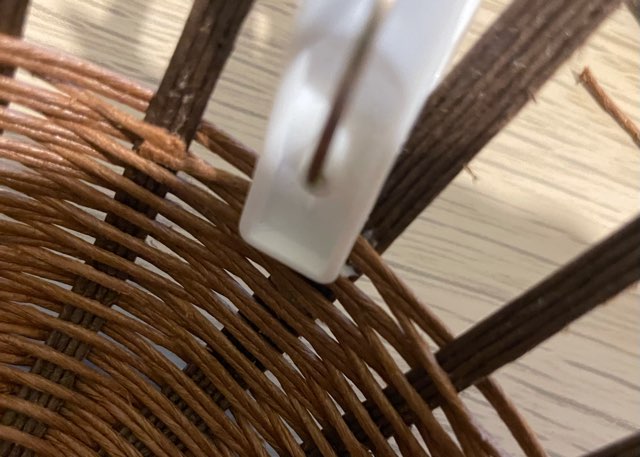
しっかり接着させるため、洗濯バサミを使って止めておきます。
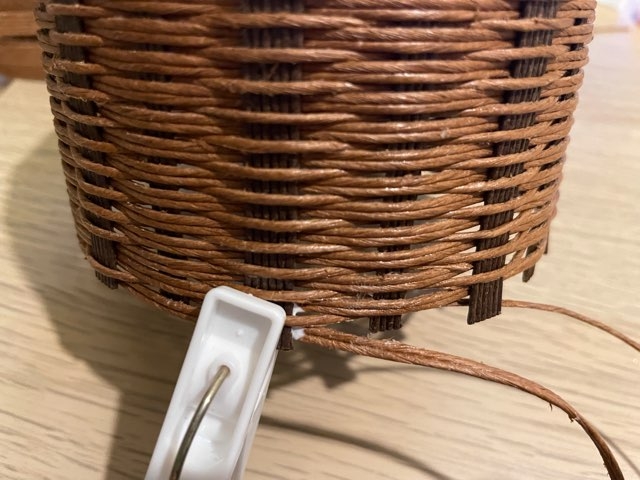
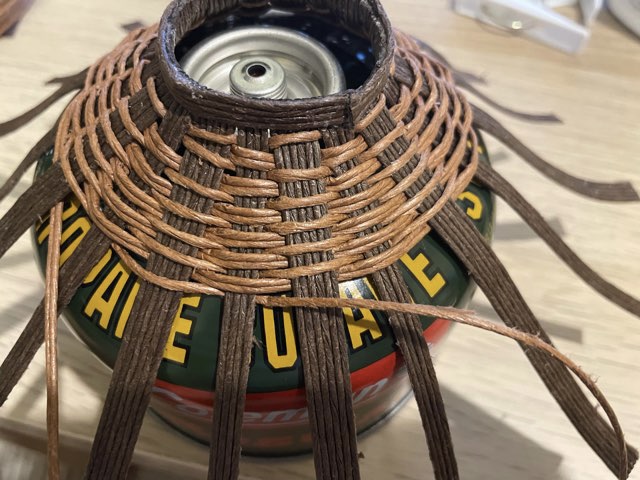
縦紐の終わりまで編んでいき、❻と同じようにボンドで接着させます。

最後に下の部分を貼り付けて終わりです!
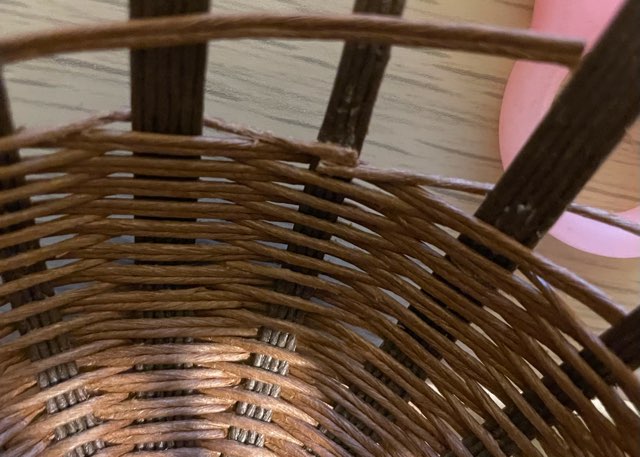
クラフトバンドで作るOD缶カバー
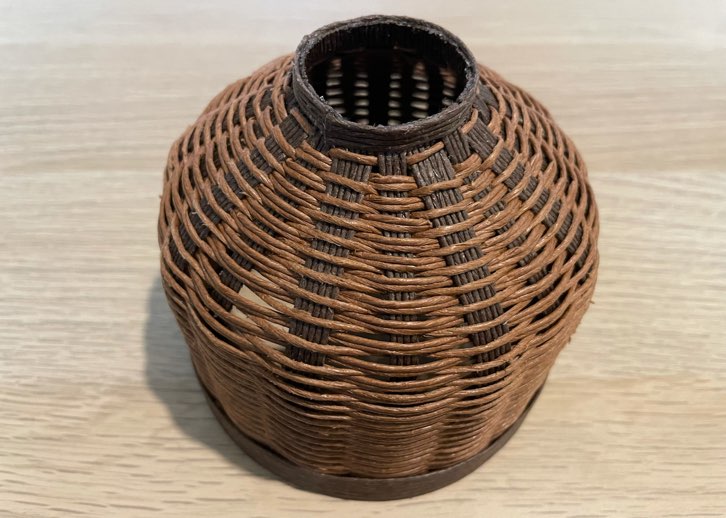
いかがでしたか?100均で作ったとは思えないおしゃれなOD缶カバーですよね!
単色でもおしゃれですし、いろんな色を使って作ってみるのもオススメです!
自作だと愛着もかなり湧きますし、ぜひ作ってみてくださいね!